

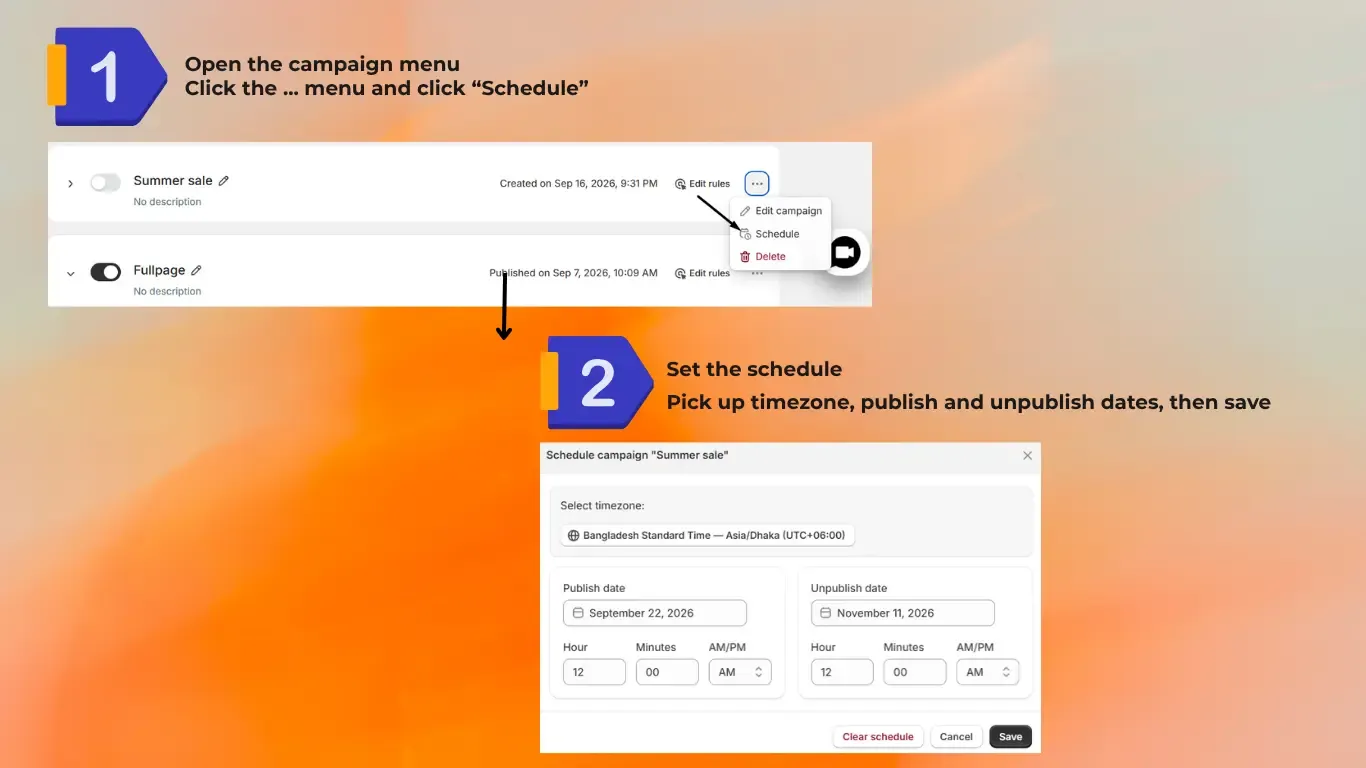
Campaign scheduling allows you to control your Optinify campaigns.
You can set a specific start date, start time, end date, and end time. Once scheduled, Optinify will automatically display your campaign during the selected period.
How to Schedule a Campaign in Optinify
Follow the steps below to schedule your campaign.
Step 1: Open Campaigns
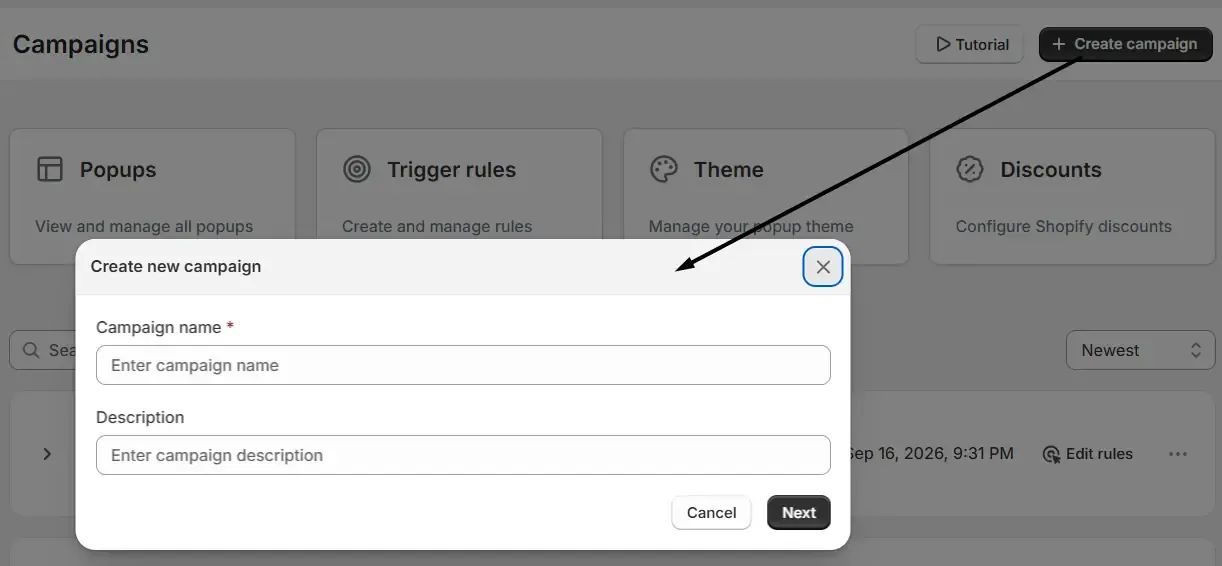
First, log in to your Optinify dashboard.
Navigate to the Campaigns section to view your existing campaigns or create a new campaign.
From here, you can start building a popup campaign based on your marketing goal.
Step 2: Select a Campaign Template
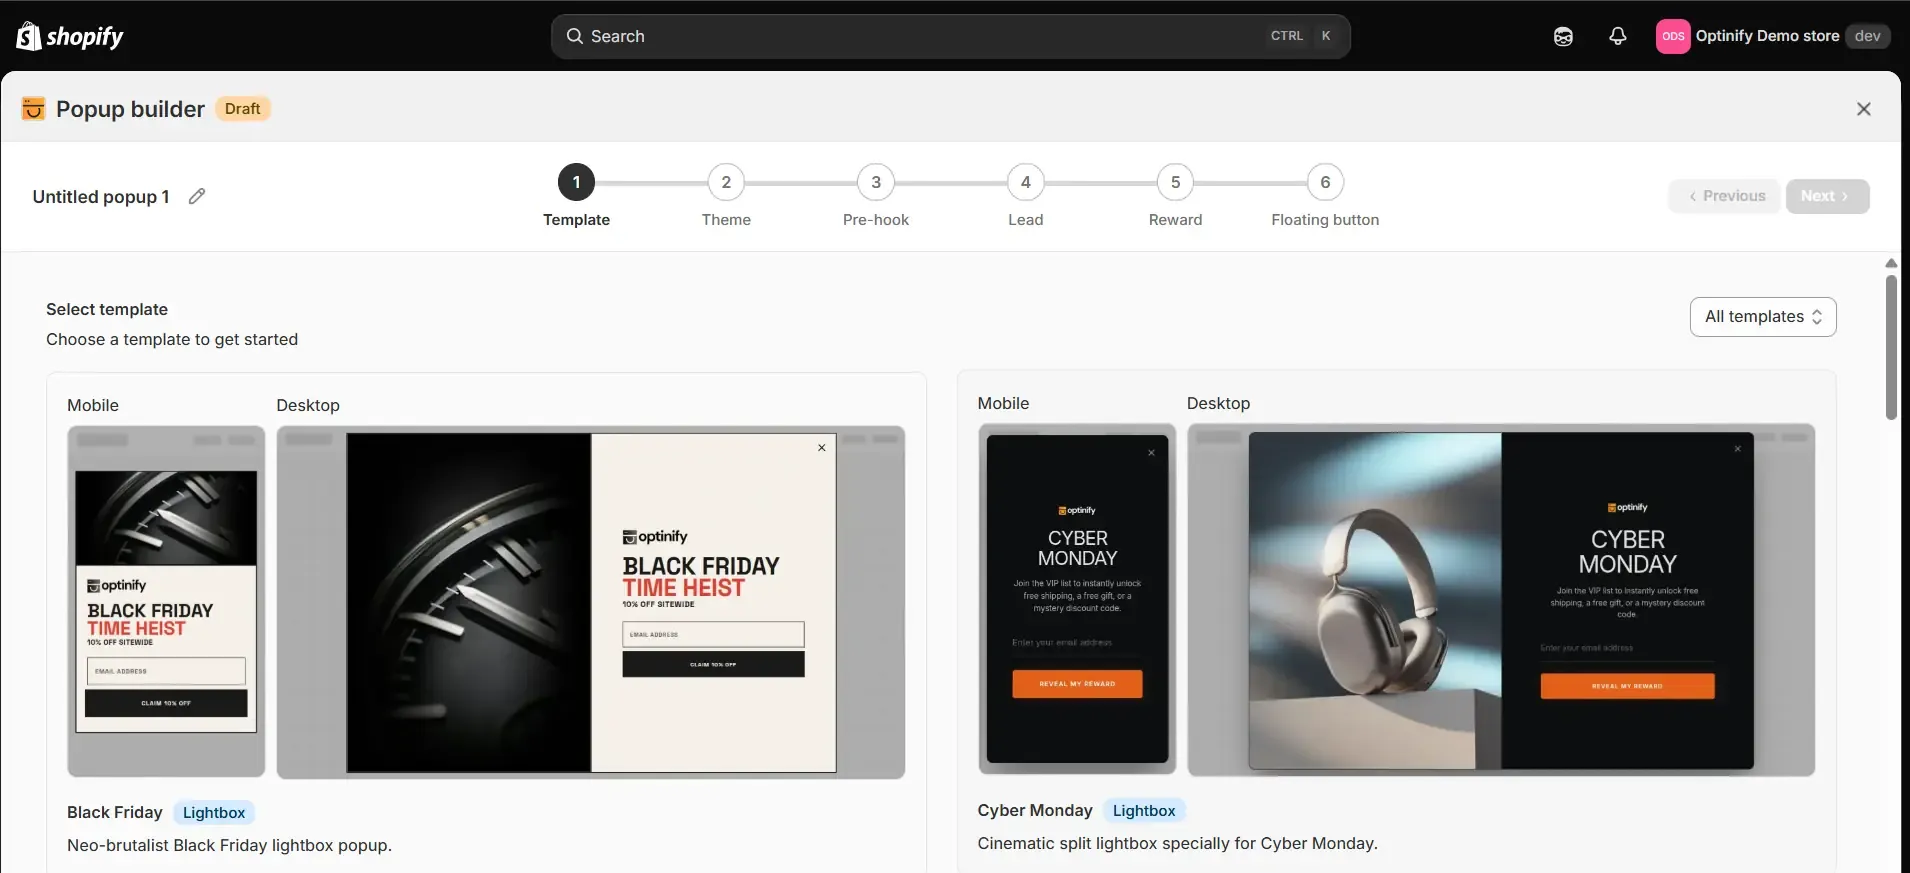
After creating a new campaign, choose a template that matches your campaign objective.
Optinify provides ready-made templates for different marketing purposes, including:
- Discount offers
- Email collection popups
- Product announcements
- Seasonal promotions
- Lead generation campaigns
Select your preferred template and continue customizing your campaign.
Step 3: Customize Your Popup Template
Once you select a template, customize it according to your Shopify store branding and campaign goal.
You can modify elements such as:
- Popup text
- Images
- Colors
- Buttons
- Offer details
- Design elements
Make sure your popup communicates your offer clearly and provides visitors with a reason to take action.
Step 4: Configure Trigger Rules
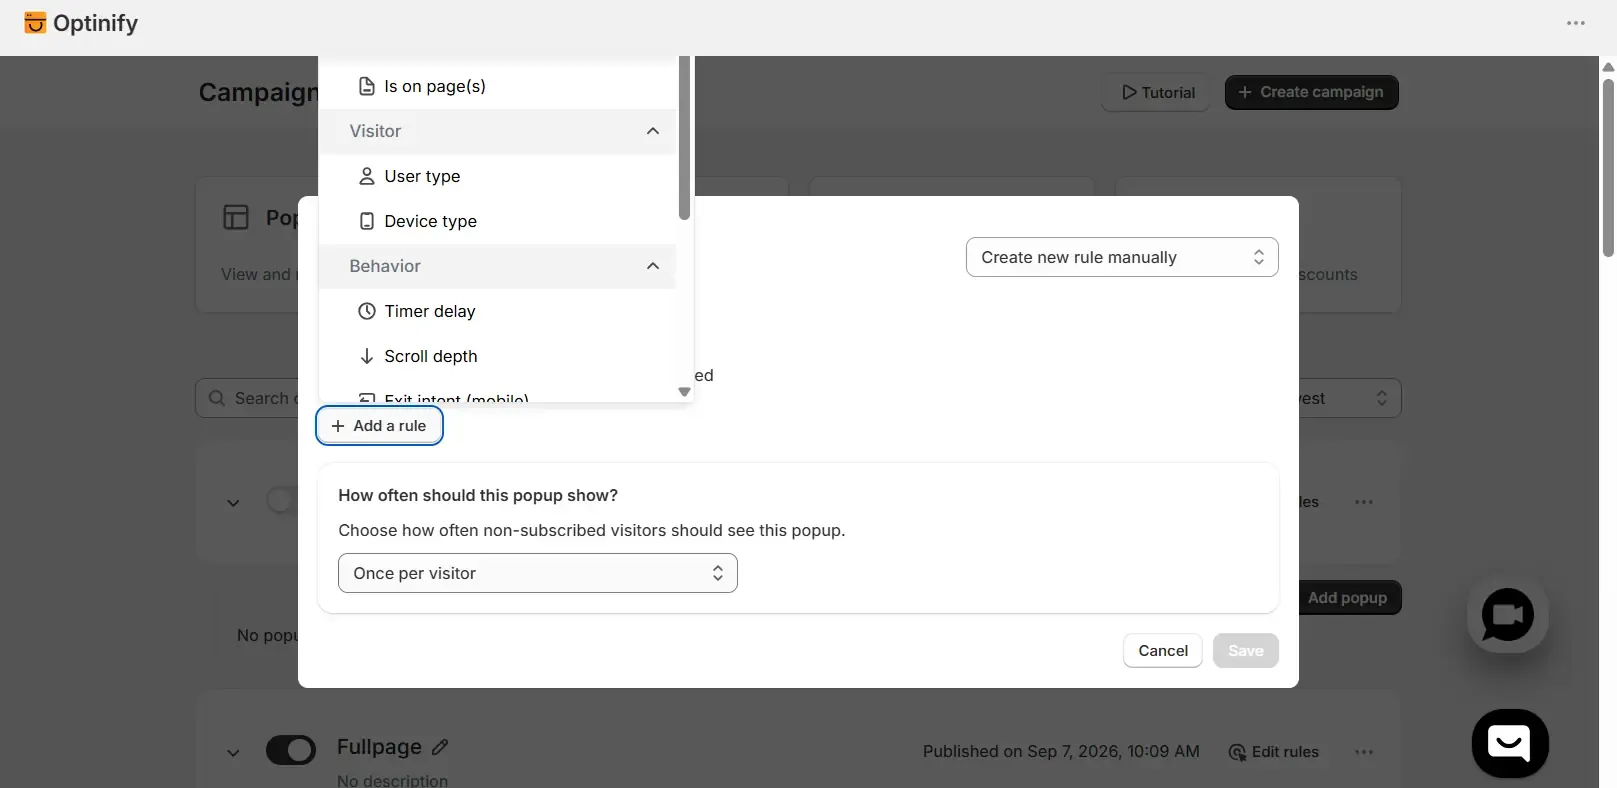
After designing your popup, configure the trigger rules.
Adjust the settings based on when and how you want your popup to appear.
Proper trigger settings help you show campaigns to visitors at the right moment without creating a poor user experience.
Step 5: Schedule Your Campaign
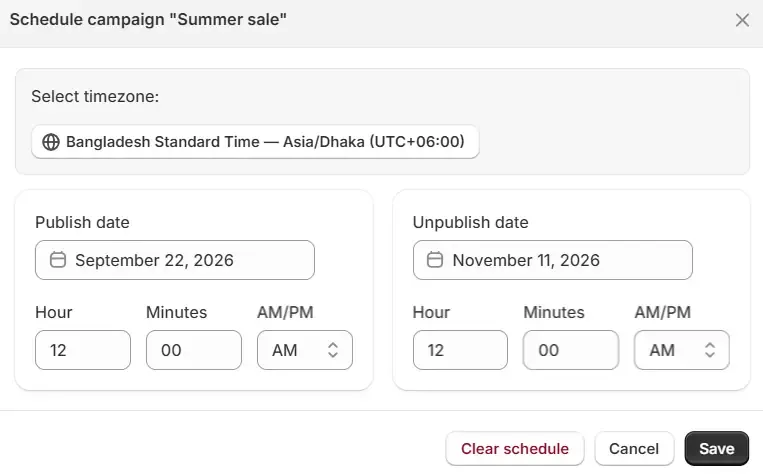
Now configure the campaign schedule.
Choose:
- Start Date
- Start Time
- End Date
- End Time
You can select the exact period when your Shopify popup campaign should become active and when it should stop.
Example:
Campaign: Black Friday Discount Popup
Start: November 25, 12:00 AM
End: November 30, 11:59 PM
Optinify will automatically display your popup during this scheduled period.
Step 6: Save and Activate Your Campaign
After completing all settings, save your campaign.
Your campaign will now follow the schedule you selected.
Optinify will automatically:
- Start showing your popup at the scheduled time
- Stop showing your popup when the campaign ends
You do not need to manually monitor the campaign status.
Step 7: Monitor Campaign Performance
After your campaign starts running, review its performance from the Optinify dashboard.
Analyze important campaign insights and use the data to improve future promotions.
Testing different:
- Offers
- Popup designs
- Timing strategies
- Campaign schedules
can help you understand what works best for your audience.
This is how you can schedule your campaign using Optinify.
Create now and schedule
You can create a campaign now and schedule it for future
Free 14-day trial • Setup in 60 seconds • Human support