
How to create a A/B test campaign with Optinify step by step
Learn how to easily set up an A/B test using Optinify in this complete, step-by-step guide. Discover how to split-test your Shopify popup designs, triggers, and special offers to find out exactly what converts best, helping you capture more leads and drive more sales for your store.

A/B testing allows you to compare two or more versions of a campaign to see which one performs better. By testing different headlines, designs, or triggers, you can optimize your conversion rates based on real user data.
Step by step guide
1. At first install Optinify from Shopify app store. Once done, you will land in the dashboard.
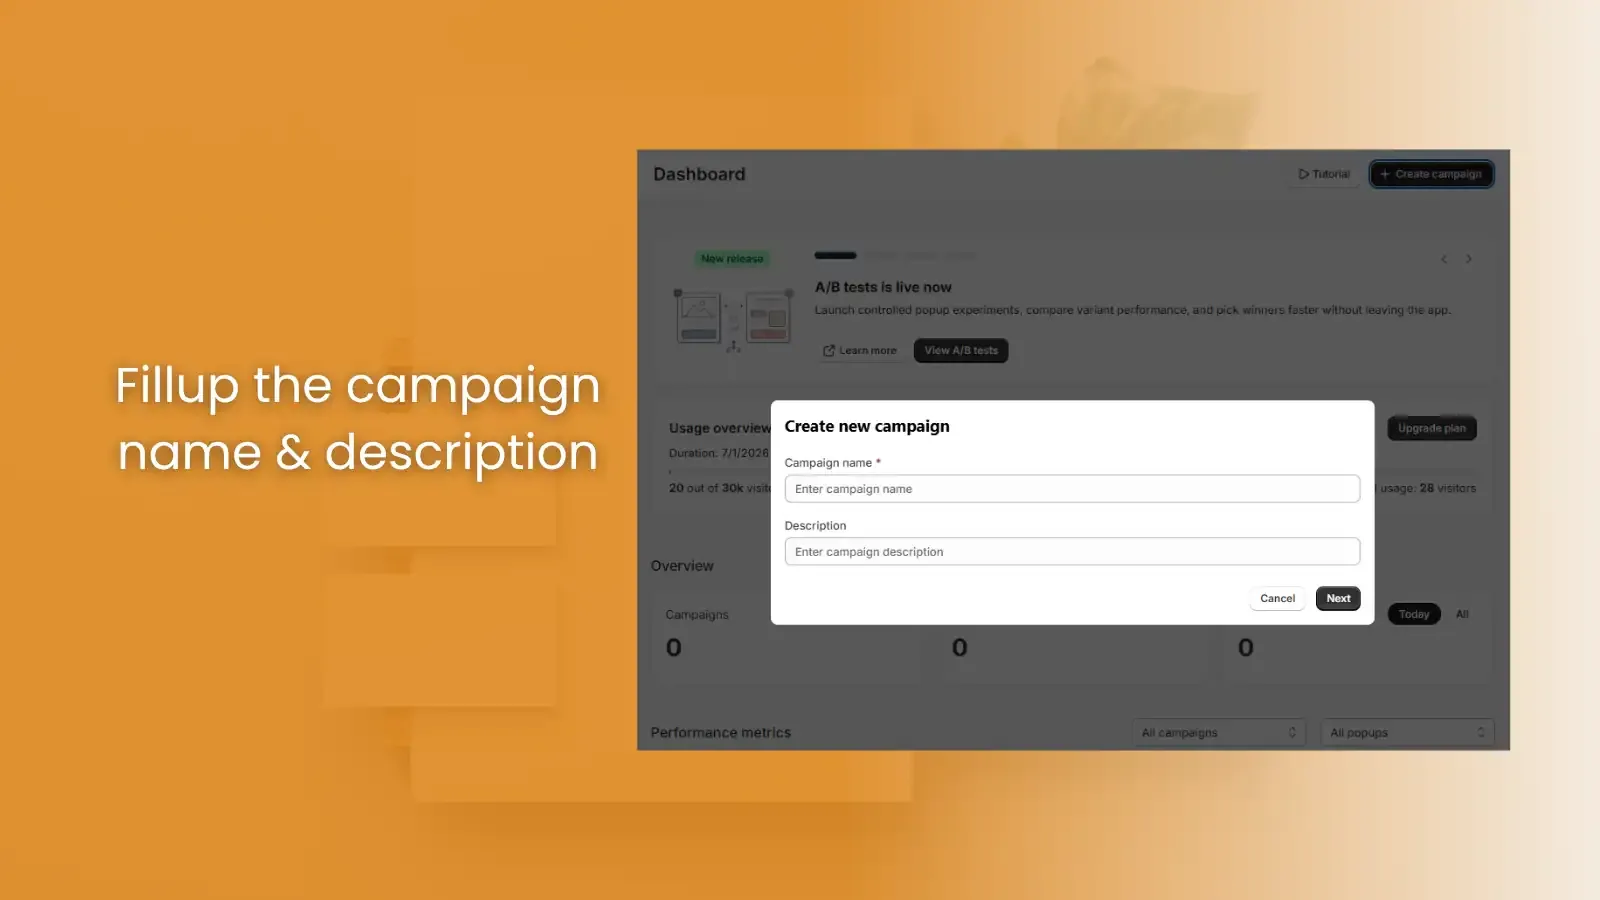
2. Tap on create campaign. Type the name and the description and click next.
3. Select a template you like and click next.
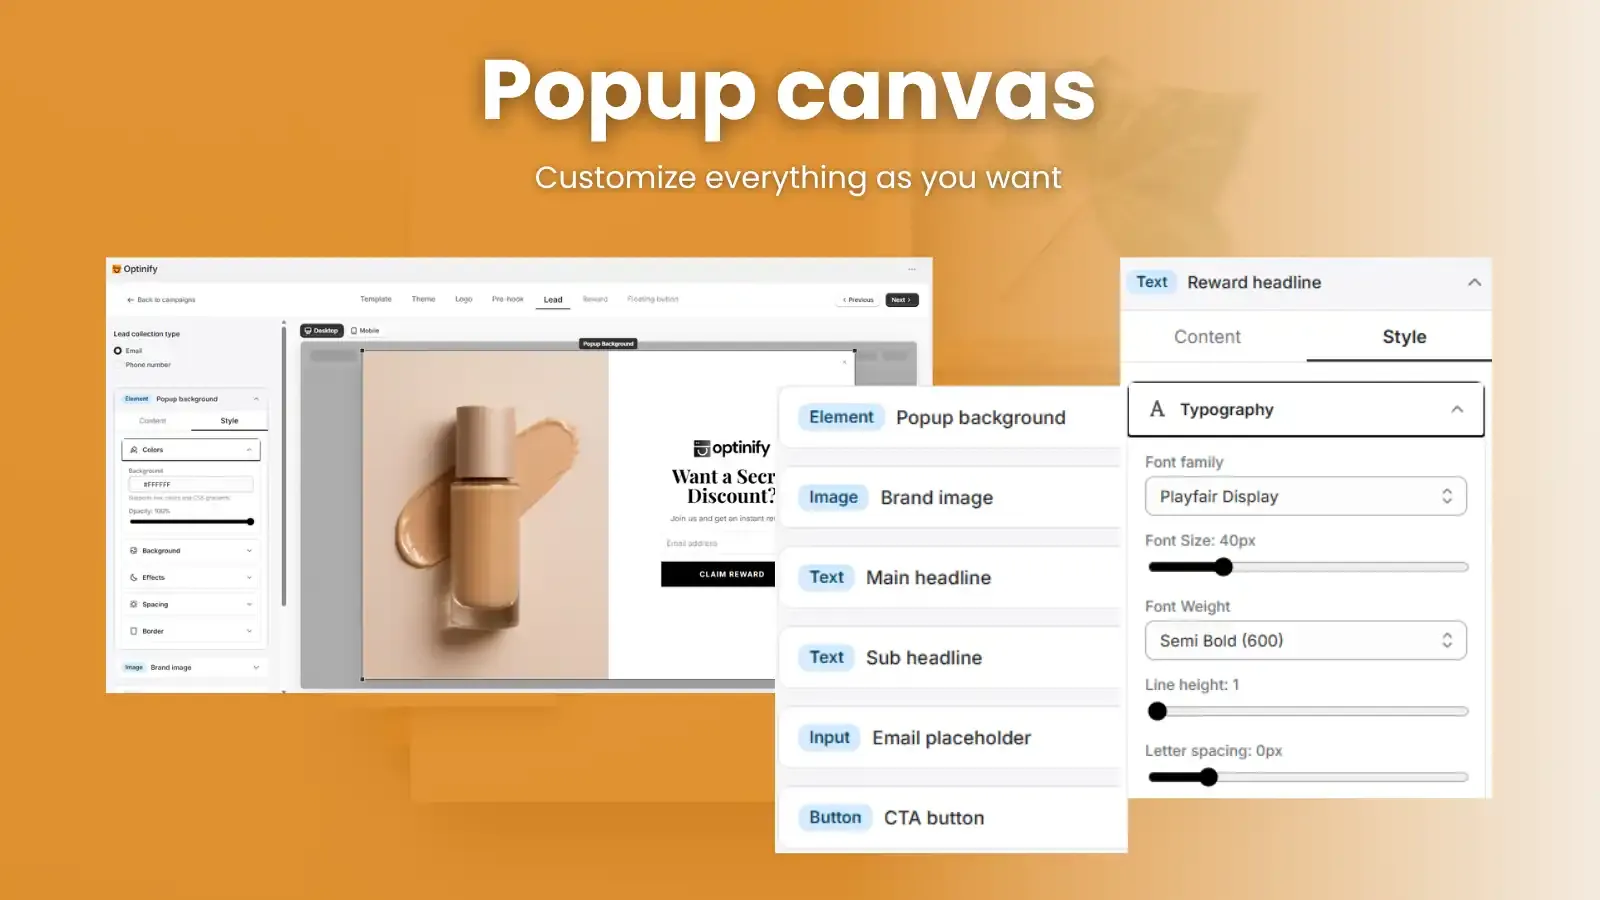
4. Customize the popup as per your necessity from the canvas. Each & every component is customizable here. Once done, click finish.
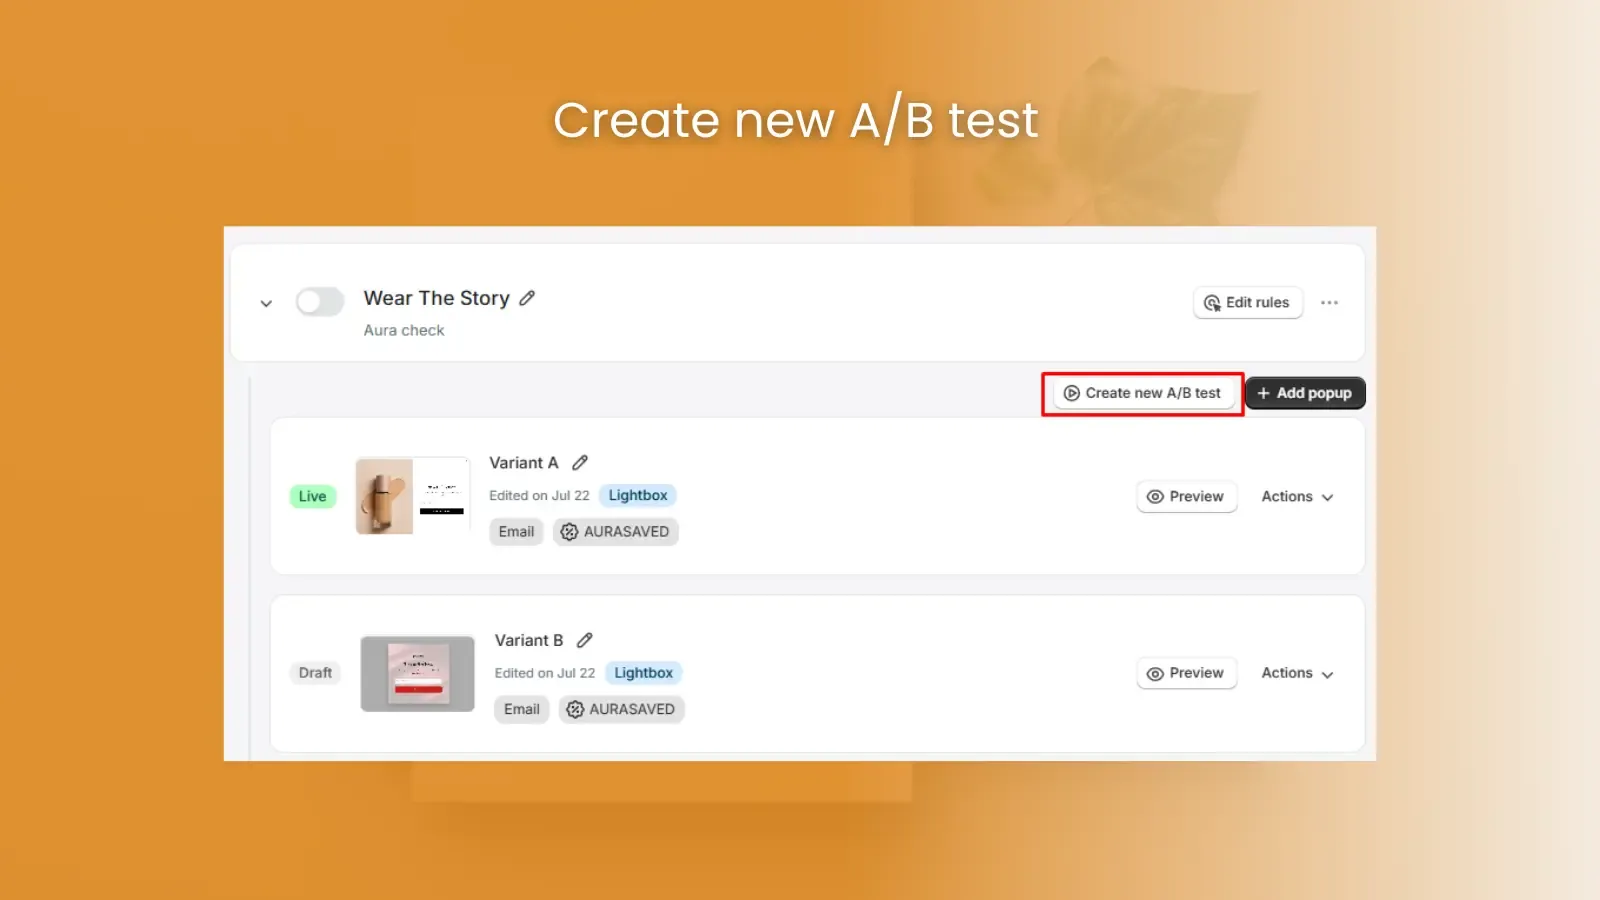
5. For A/B testing you need two or more popups. So create those accordingly following the same steps. Once done, click on create new A/B test.
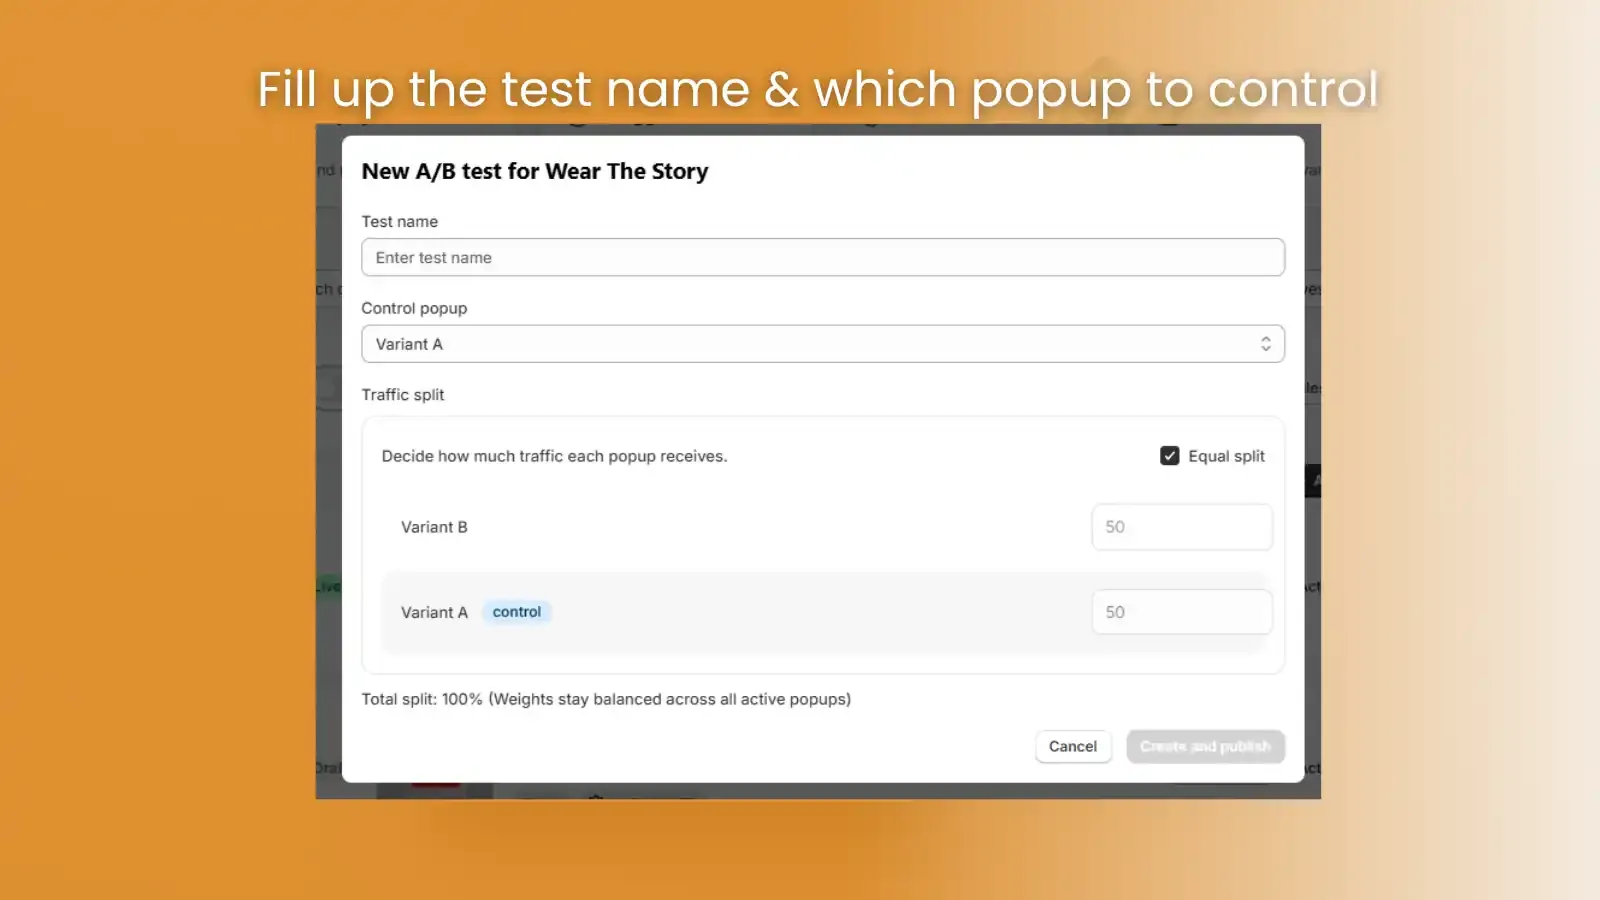
6. Write the test name and which popup you want to control. After that you can split the traffic. If you want, you can split equally. If not, you can split manually. But make sure that the total split is 100%. Once done, click Create and publish. That’s it. You have created a new A/B test.
Optinify Pro Tip
Identify the single variable you want to test (e.g., button color, CTA, headline text, or discount amount) for the most accurate results.
How to Monitor Your Results
Once your test is running, it’s time to collect data.
1. Click on View test results.
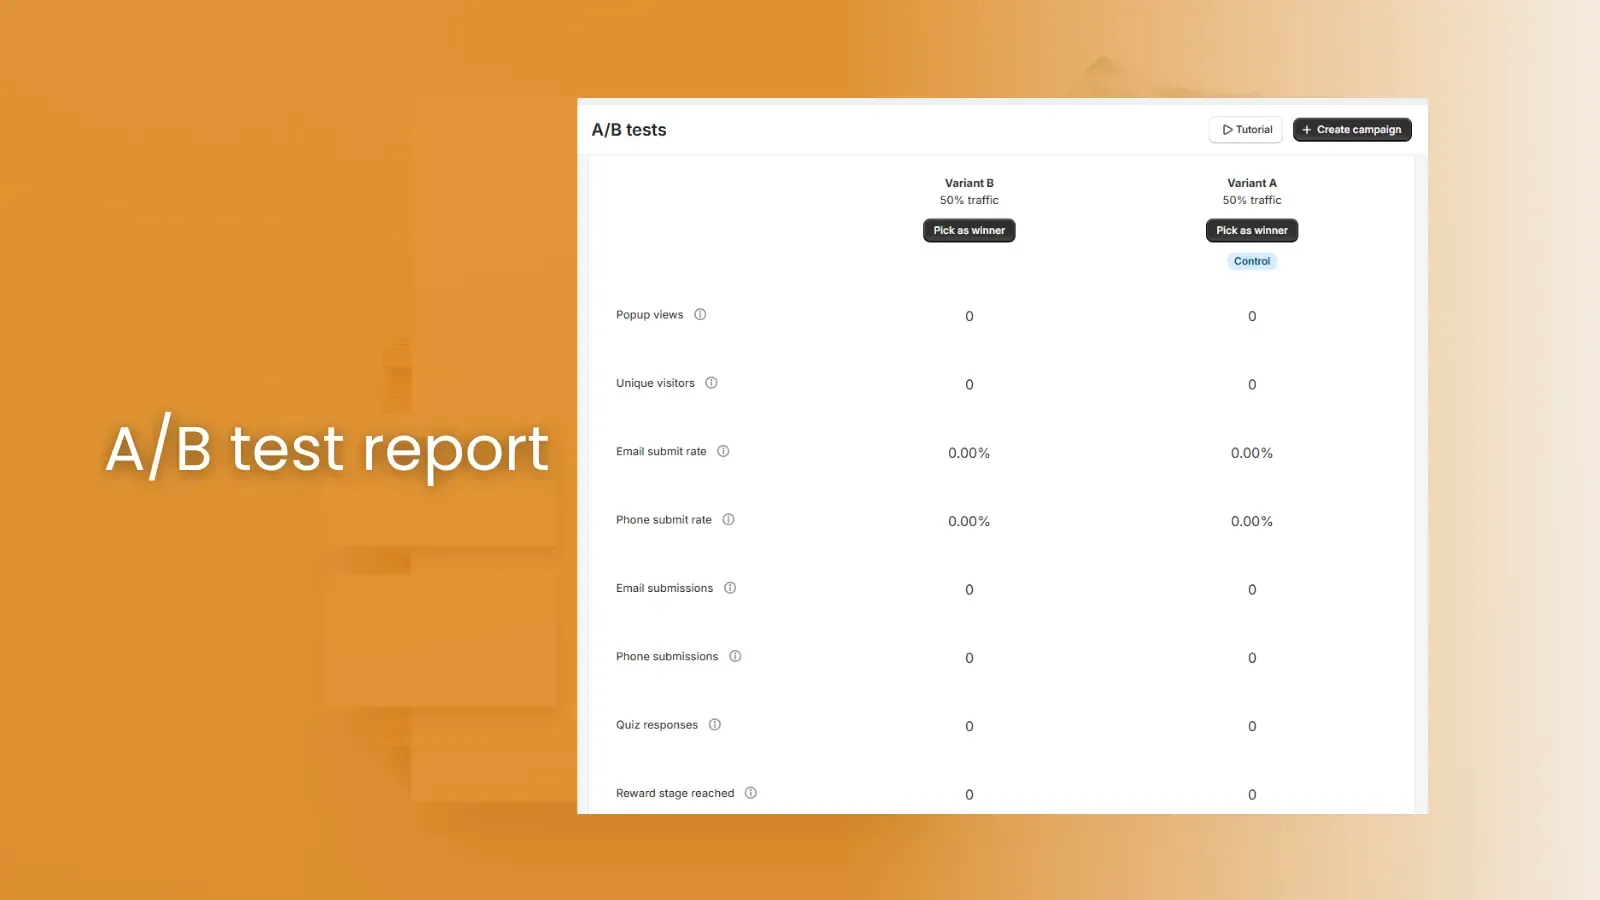
2. You can see all the test variants here. Observing the KPI’s you can take your decision & pick one variant as winner.
Create your first A/B test campaign
Human Support • Setup in 60 seconds • Free 14-day trial
What to read next

21 Website Popup Examples for Shopify Stores and Why They Work
Explore 21 website popup examples for Shopify stores. See popup ideas for email capture, cart recovery, discounts, free shipping, SMS, and more.
Read Article
Spin to Win Popup: How Shopify Stores Can Grow Email Signups and Sales
Learn how spin to win popup actually work! Discover the best prizes and perfect timing strategies to boost conversions and grow Shopify sales.
Read Article
How to Add a Popup to Shopify Store: Step-by-Step Guide
Learn how to add a popup to your Shopify store with Optinify. Follow this step-by-step guide to create, customize, test and publish Shopify popups.
Read Article