

At first install Optinify from Shopify app store. Once done, you will land in the dashboard.
Steps to configure Optinify with Mailchimp
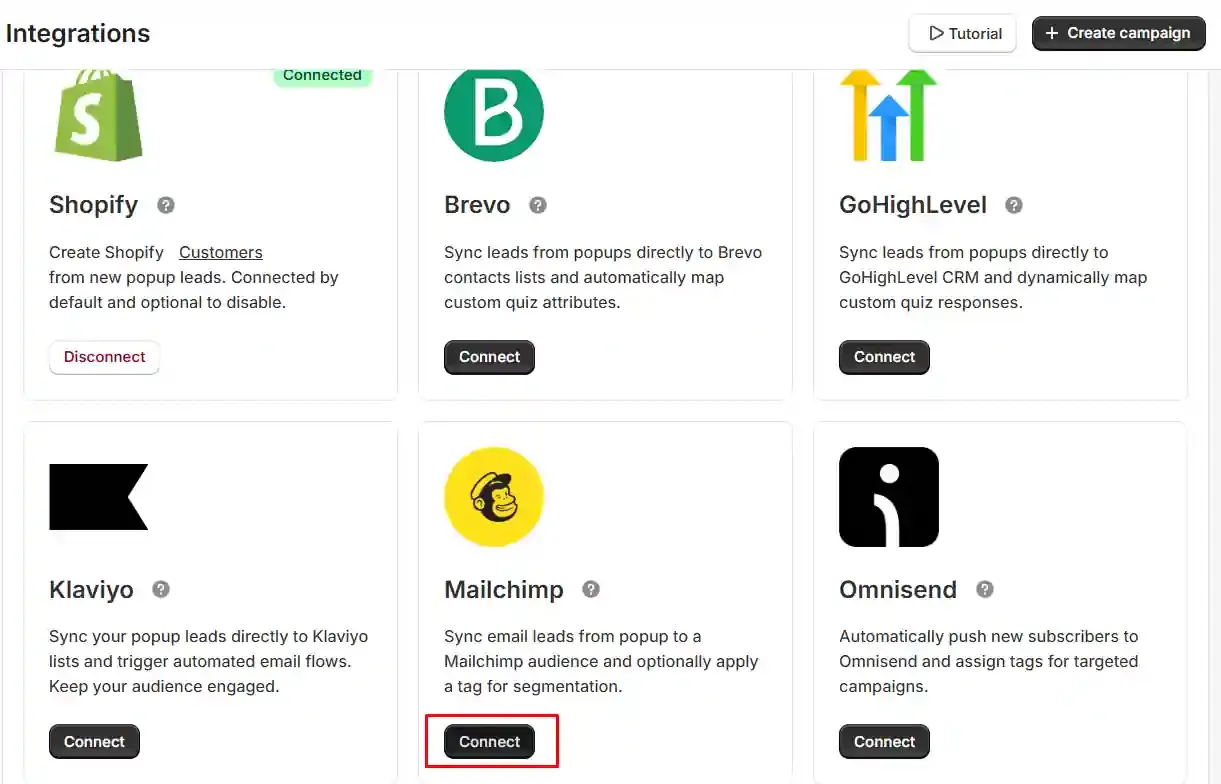
1. Tap on the option “Integration” and find “Mailchimp.”
2. Click on “Connect.”
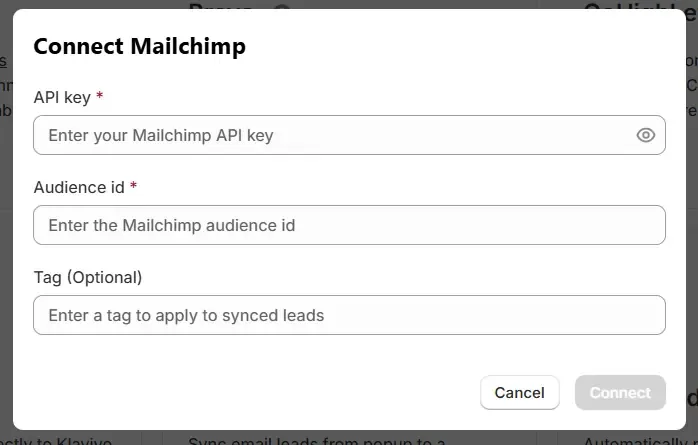
3. You need the “API KEY,” “Audience ID,” & the Tag (Optional) to get connected. To get all those, sign in to your MailerLite account.
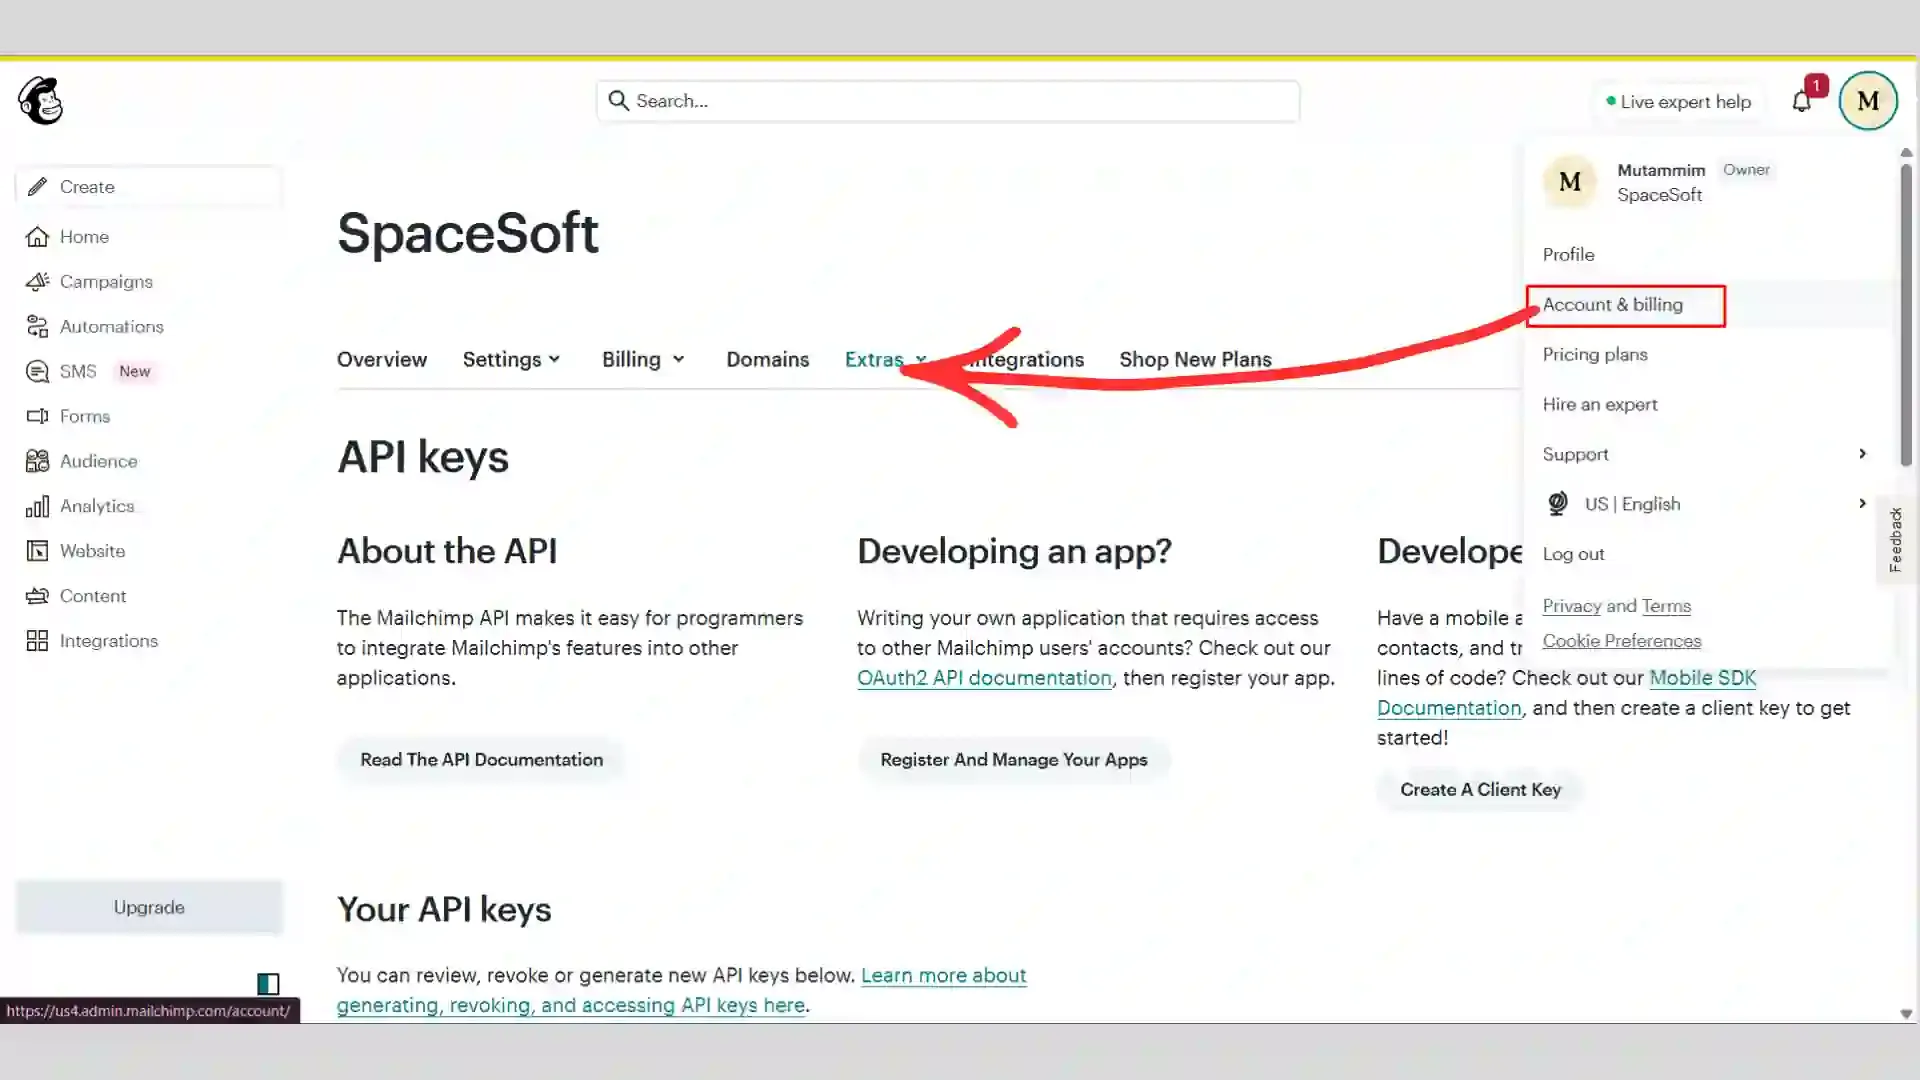
4. To get the “API Key,” go to “Account & billing” then “Extras.” You will find the Option “API Keys.” Go there & on “Create a key” and generate a key. Copy that and paste into Optinify.
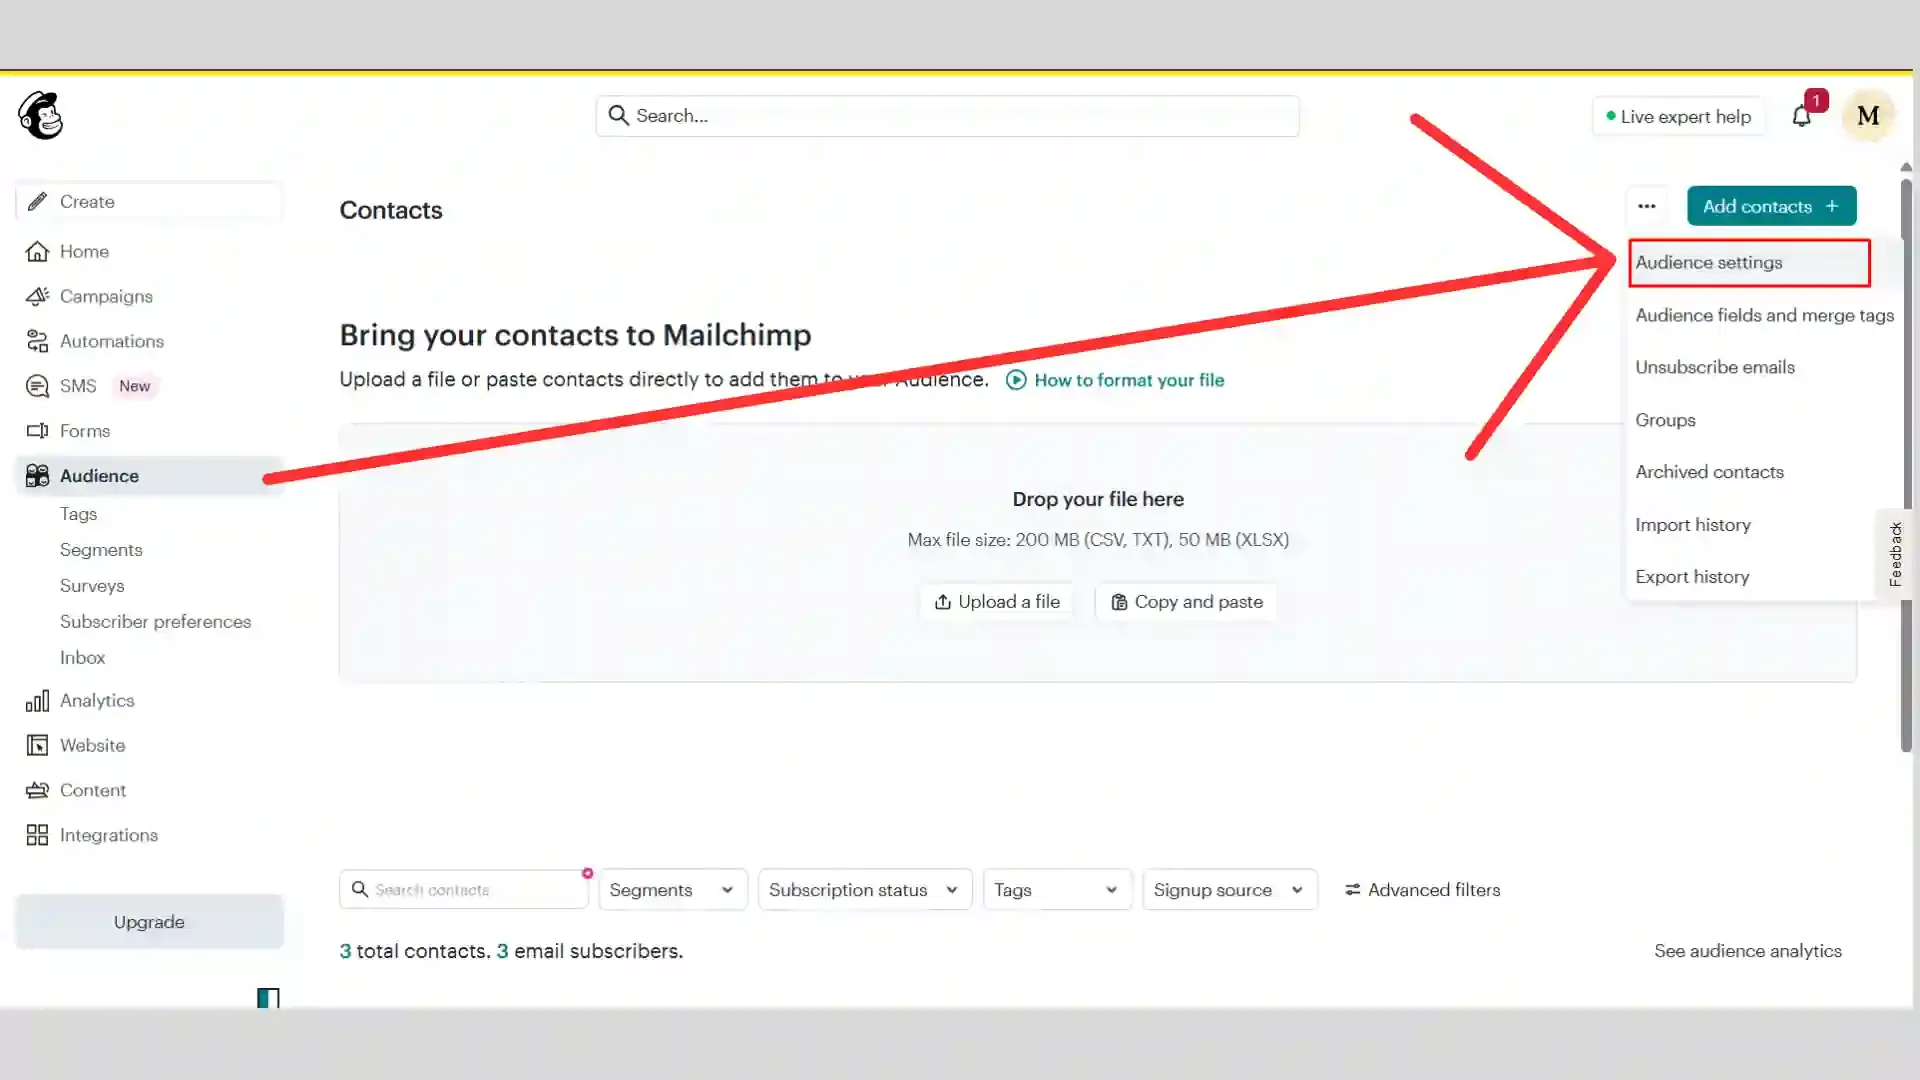
5. To get the “Audience ID,” click on “Audience,” go to the three dot and click there. You will find “Audience settings,” click on that and you will get the “Audience ID.” Copy that and paste into Optinify.
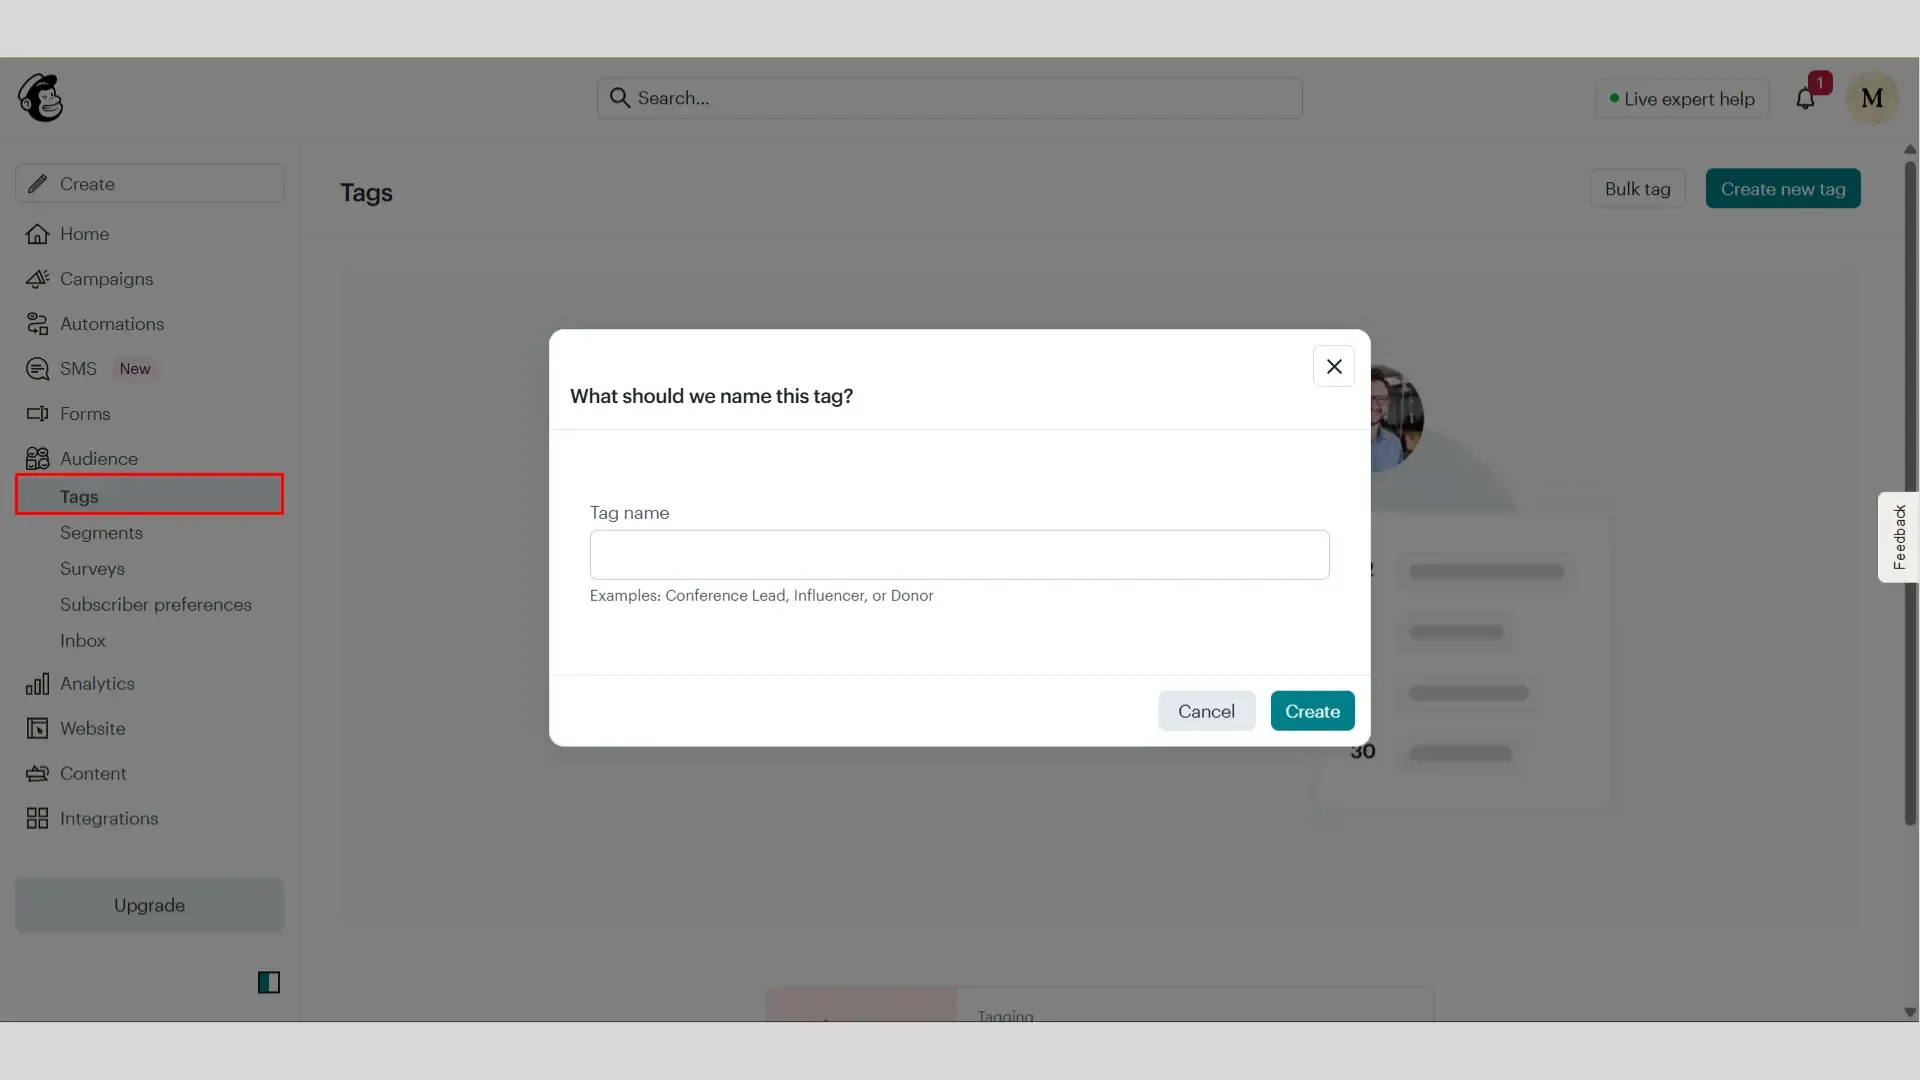
6. To get the “Tag (Optional),” go to “Audience,” then “Tags.” Create a tag and paste into Optinify.
7. That’s it. You are done with the integration of Optinify with GoHighLevel.
Need help to connect Mailchimp?
Schedule a call. We are just a call away.
Human Support • Setup in 60 seconds • Free 14-day trial